Are you looking to create a PayPal account in India and that too for free?
Then you are in the right place. I will walk you through every step required to create a PayPal Account.
If you are a freelancer and want to receive money from your international clients, then PayPal is the best option for you.
What is PayPal?
PayPal is an online service that allows you to send or receive money. It can also be used to receive or make international payments.
If you are working online to make money, then the PayPal account is a must for you to send and receive payments.
You can start sending the payment as soon as you Sign-Up on Paypal and add your card details. But to receive payment you need to link your bank account.
You just need a recipient email address to send money. You can also make online payments through PayPal in an online e-commerce store.
Let get started on how to create a PayPal account in India.
How to Create a PayPal Account in India
Before creating an account, make sure you have the following details.
Pre-requisites to create a PayPal Account:
- Email Id
- Pan Card
- Bank Account
1. Visit PayPal’s Official Website
To go to the official PayPal Sign-Up Page Click Here.
You will see something like this.

Click on Sign Up.
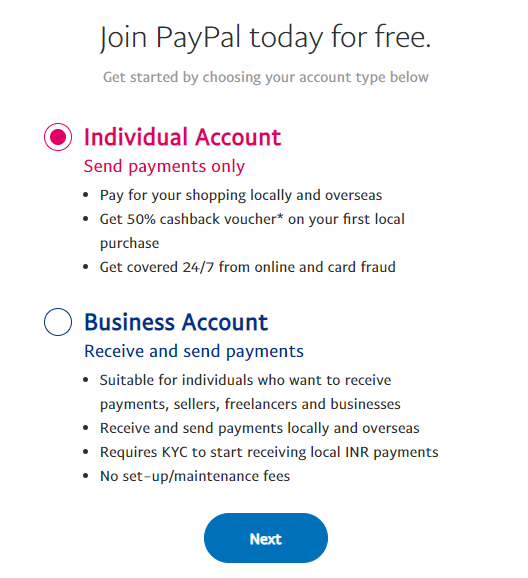
2. Select Your Account Type
Click on Individual Account(If you require a Business Account In the future, you can upgrade later)

Click Next.
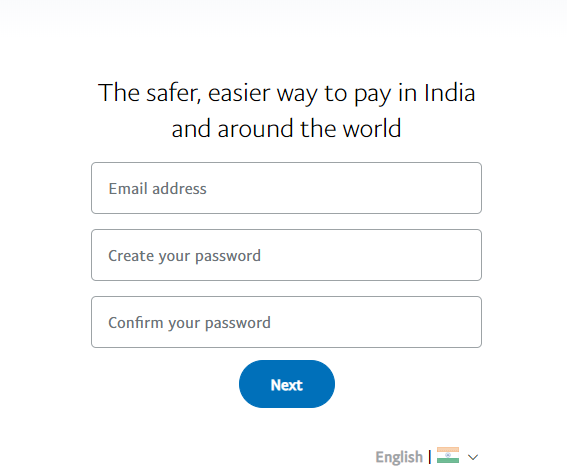
3. Enter Details

- Enter Your Email
- Create Password
- Confirm Password
**Make sure that you remember the password you have entered. It will be required at the time of login.
You need to provide your email address to the sender to receive an amount in your account.
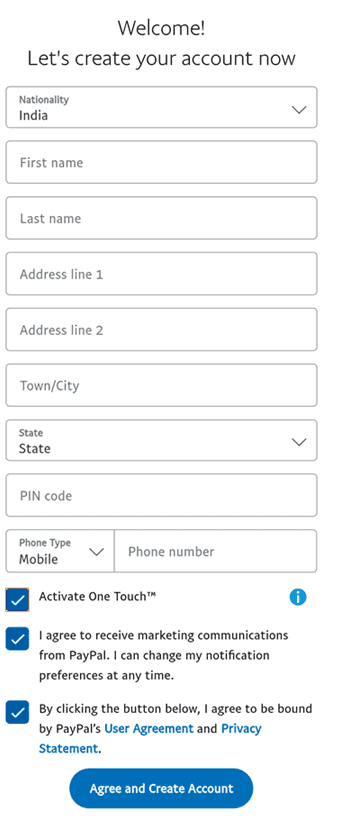
4. Fill Your Personal Details

On this page, fill your name, address, state, pin-code and mobile number as below.
Note that you enter the correct details the same as on your PAN and Bank Account.
Now, click on Agree and Create Account.
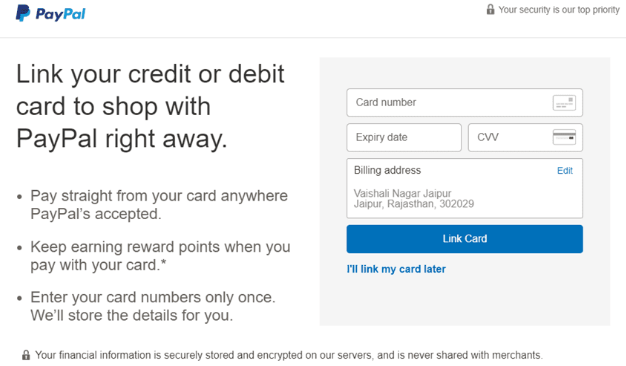
5. Link Card Details
Now you will be asked to add your Debit or Credit Card Details as shown below.

If you want to skip for now, you can click on I’ll link my card later.
6. Account Created Successfully
After completing the above steps, your account creation will be successful.
Click on Go to your account.
7. Confirm Mobile and Email
On your dashboard, you will be asked to verify both your Mobile Number and Email. You will receive an OTP for mobile verification and an email for verifying your email address.
8. Add Credit or Debit Card Details
For shopping online through PayPal, you need to enter either your Debit or Credit Card details.
9. Add PAN details
In this process, you need to enter basic PAN details like name and PAN number.
10. Add Bank Details
- For a complete verified PayPal Account, you must enter your bank details like name, account number, bank name, IFSC code, etc.
- After this, PayPal sends two small deposits of Rs1 to Rs2 in your bank account for verification. You will receive those deposits within 1 or 2 days.
- You can check those amounts through a mini statement slip generated from ATM. If you have online banking, log in to your account and check the transactions.
- Enter those two amounts that you have received and verify your Bank Account.
Your PayPal Account creation is successful !!!
I hope now you have understood how to create a PayPal Account in India.
PayPal is a secure way to send and receive money from almost all parts of the world.
Having a PayPal account makes it easier if you want to receive payments from your international clients. You can also make payment in most of the international shopping sites easily.
If you find this article helpful, share it with your friends and family so that they can also create a PayPal Account easily.


